Basic Git Workflow
This document describes a common Git workflow that you will likely encounter every day. It will cover the following topics:
- Cloning a repository
- Creating a branch
- Making changes to a branch
- Committing those changes
- Pushing the changes to the remote repository
- Opening a pull request
- Requesting a code review
- Merging a pull request
This document assumes that you have Git installed on your machine, have it configured properly, and have an existing repository to work with in GitHub.
Cloning the repository
It's typically recommended to clone all of your Git repositories to the same parent directory. A
good practice is to create a ~/workspace directory where you can manage all of your projects.
Assuming that we are working with the repository
https://github.com/SSMHealth/cg-documentation,
we can clone it to our local machine by running the following command:
mkdir ~/workspace
cd ~/workspace
git clone https://github.com/SSMHealth/cg-documentation.git
cd cg-documentation
This will create a new directory called cg-documentation inside of your ~/workspace directory.
Creating a branch
Branches are used to develop features, fix bugs, or experiment with new ideas. They are a way to
keep your changes separate from the main branch. The main branch is typically called main or
master.
To create a new branch, you can use the following command:
git checkout -b feature/my-feature
This will create a new branch called feature/my-feature and switch to it.
Making changes to a branch
Once you have created a branch, you can make changes to the code. When you make changes, you will need to stage them and then commit them to the branch.
To stage all of your changes, you can use the following command:
git add .
If you want to stage specific files, you can replace the . with the path to the file you want to
stage. For example, to stage the README.md file, you can use the following command:
git add README.md
It's useful to stage your commits in smaller chunks, but it's not required.
Committing changes
Once you have staged your changes, you can commit them to the branch by running the following command:
git commit -m "A meaningful commit message"
This will create a new commit with the changes you have staged. The commit message is a short description of the changes you made. It's important to write a meaningful commit message so that you can easily understand the changes you made later. See writing good commit messages for more information.
Pushing changes to the remote repository
Once you have committed your changes, you can push them to the remote repository by running the following command:
git push origin feature/my-feature
This will push your changes to the feature/my-feature branch on the remote repository.
Opening a pull request
Now that you have pushed your changes to the remote repository, you can open a pull request. It's possible to open a pull request from the command line, but it's far more common and easier to do this through the GitHub web interface.
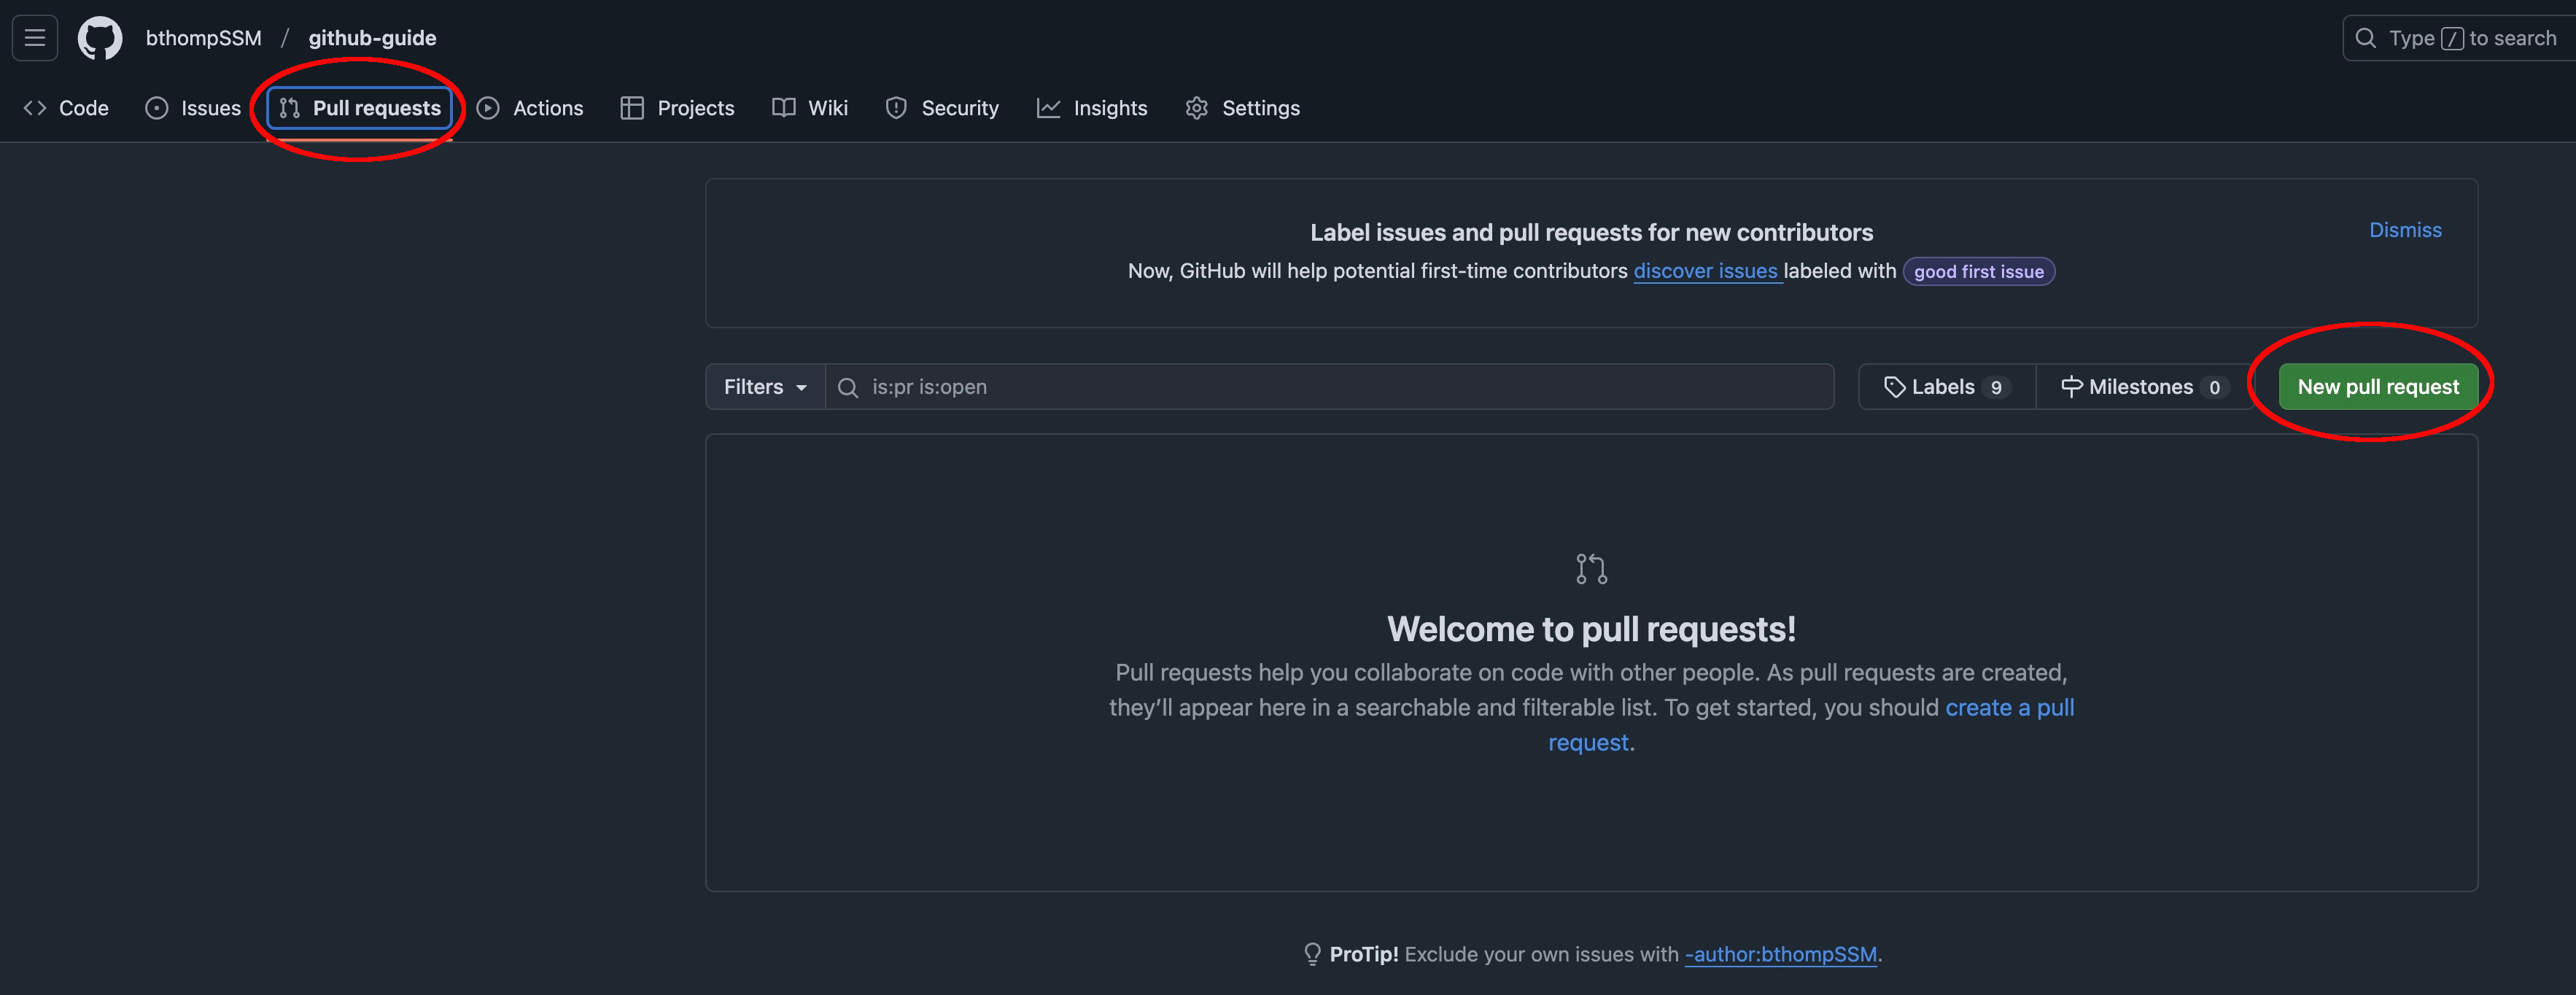
To open a pull request, you can navigate to the repository on GitHub and click the "Pull requests" tab. Then, click the "New pull request" button.
Next, you will need to select the branch you want to merge into the main branch by changing the "compare" branch. Then, click the "Create pull request" button. As a side note, it's useful to know that when you push changes to a new branch, if you visit the repository's homepage, you will see a button that says "Compare & pull request". Clicking this will take you to the same place as the steps above.
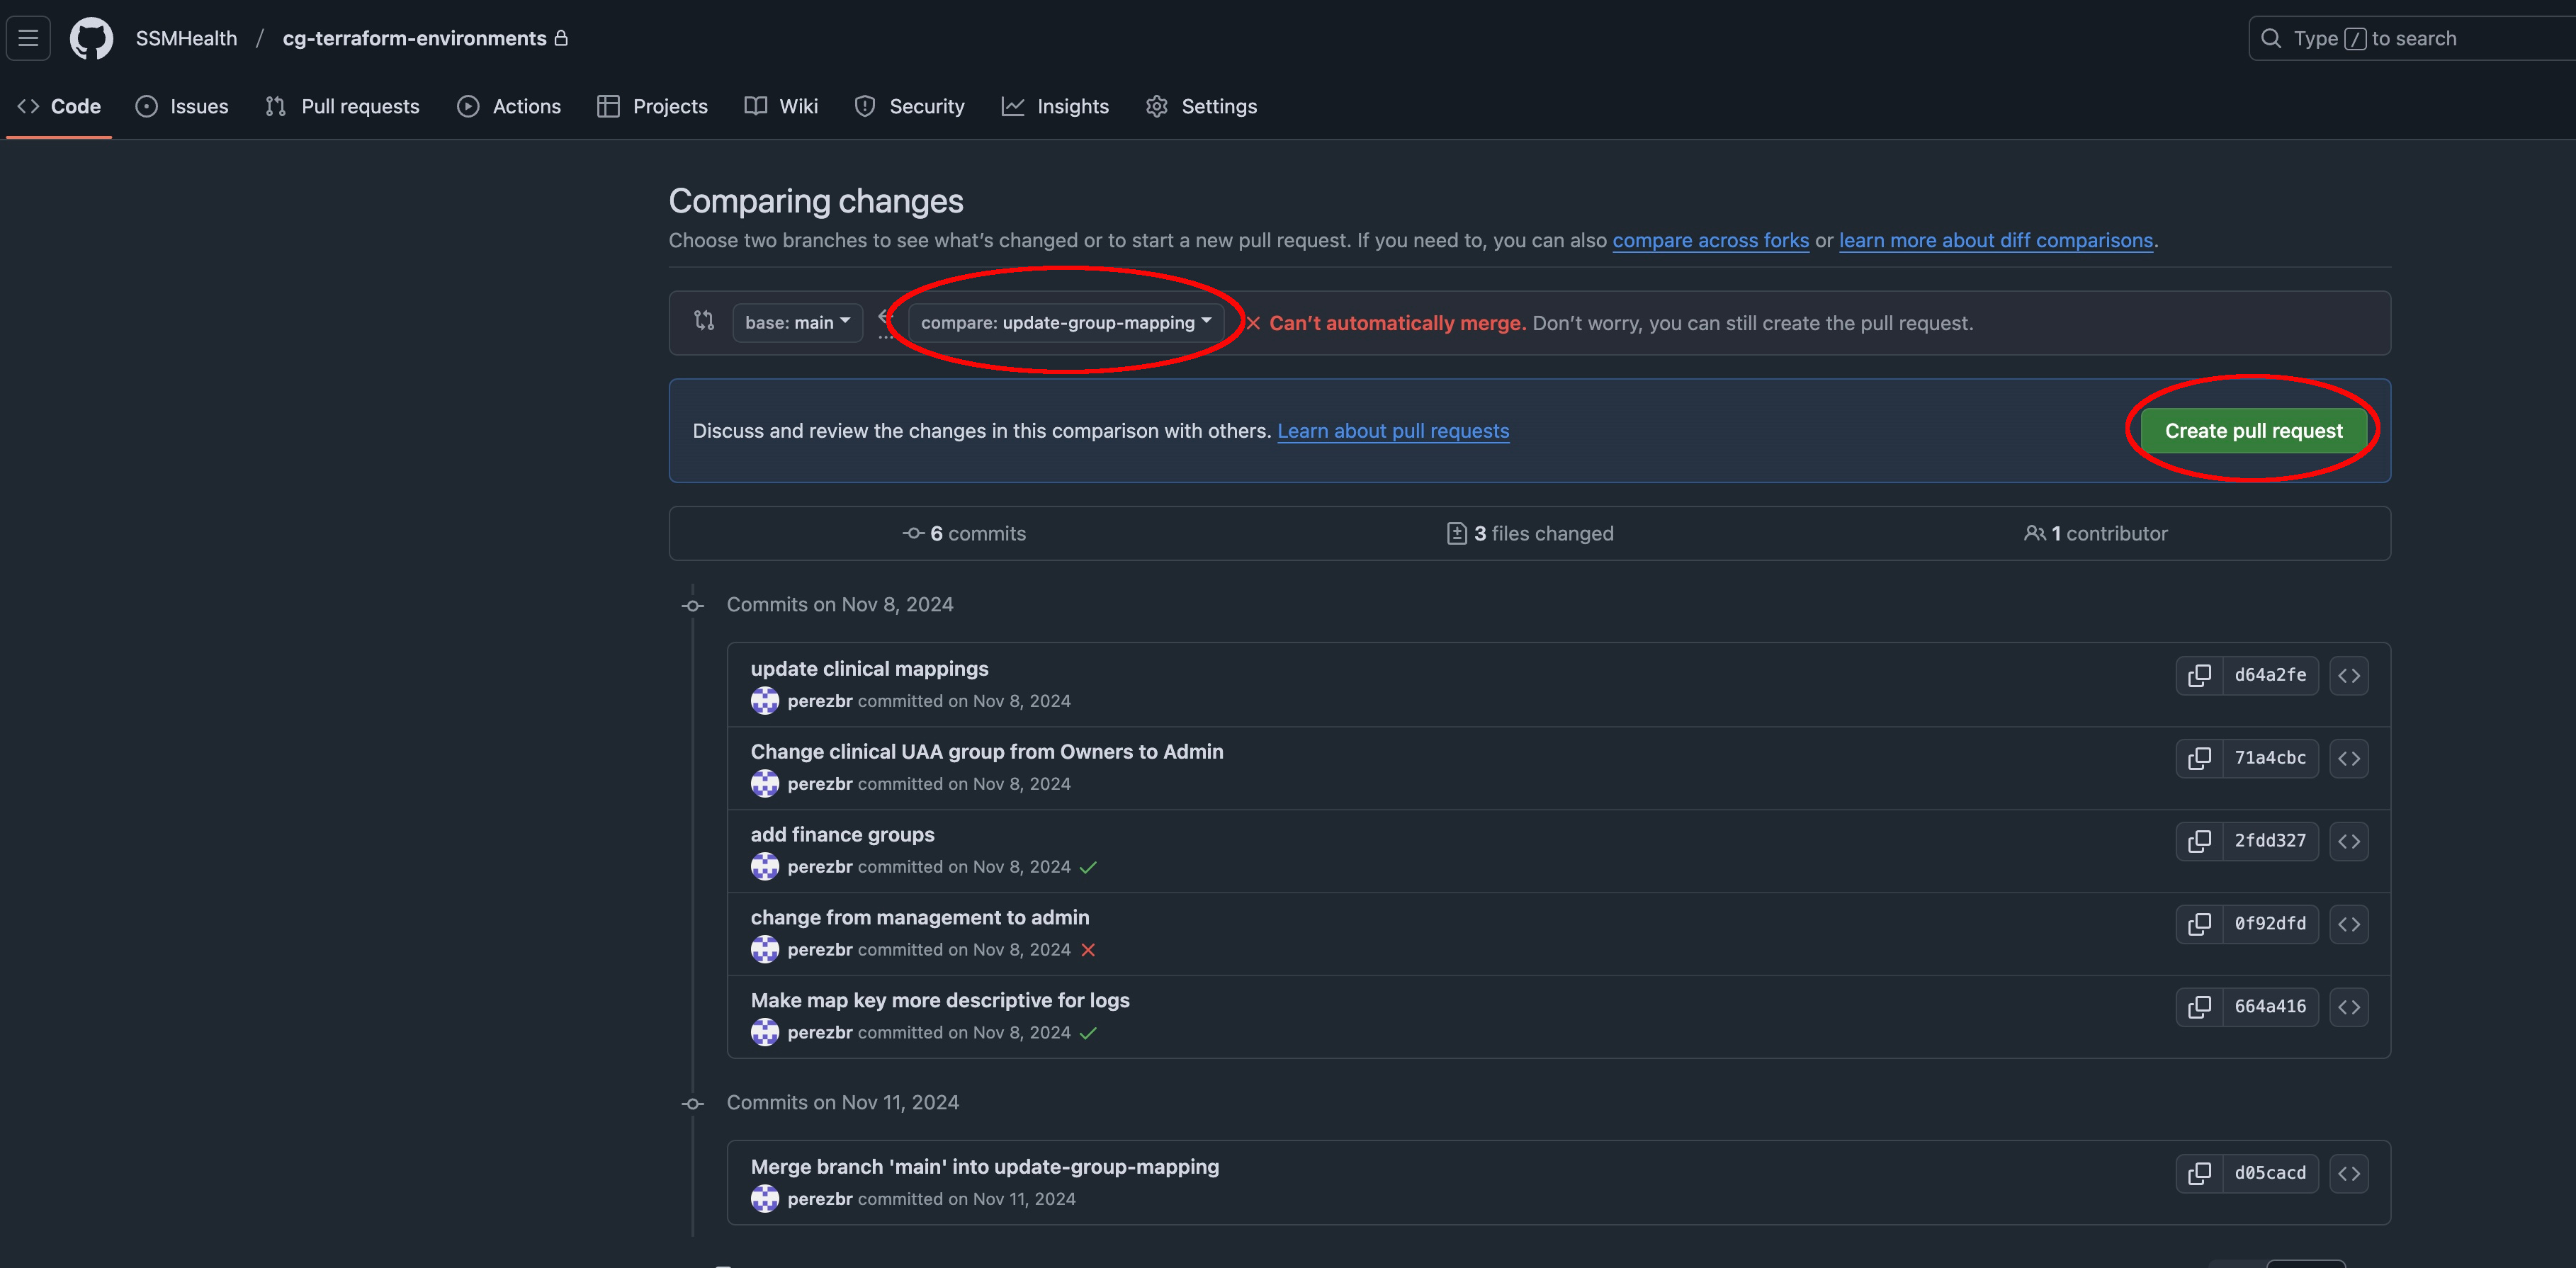
This will open a new pull request with the changes you have pushed to the remote repository. You can add a title, description, and any other details you want to include in the pull request. For more advanced GitHub users, it's also possible to create a pull request template for each repository, which will auto-populate the pull request with a default title, description, and other details.
Requesting a code review
Once you have opened a pull request, you can request a code review from another developer. To do this, you can click the "Reviewers" button and select the developer you want to review your changes.
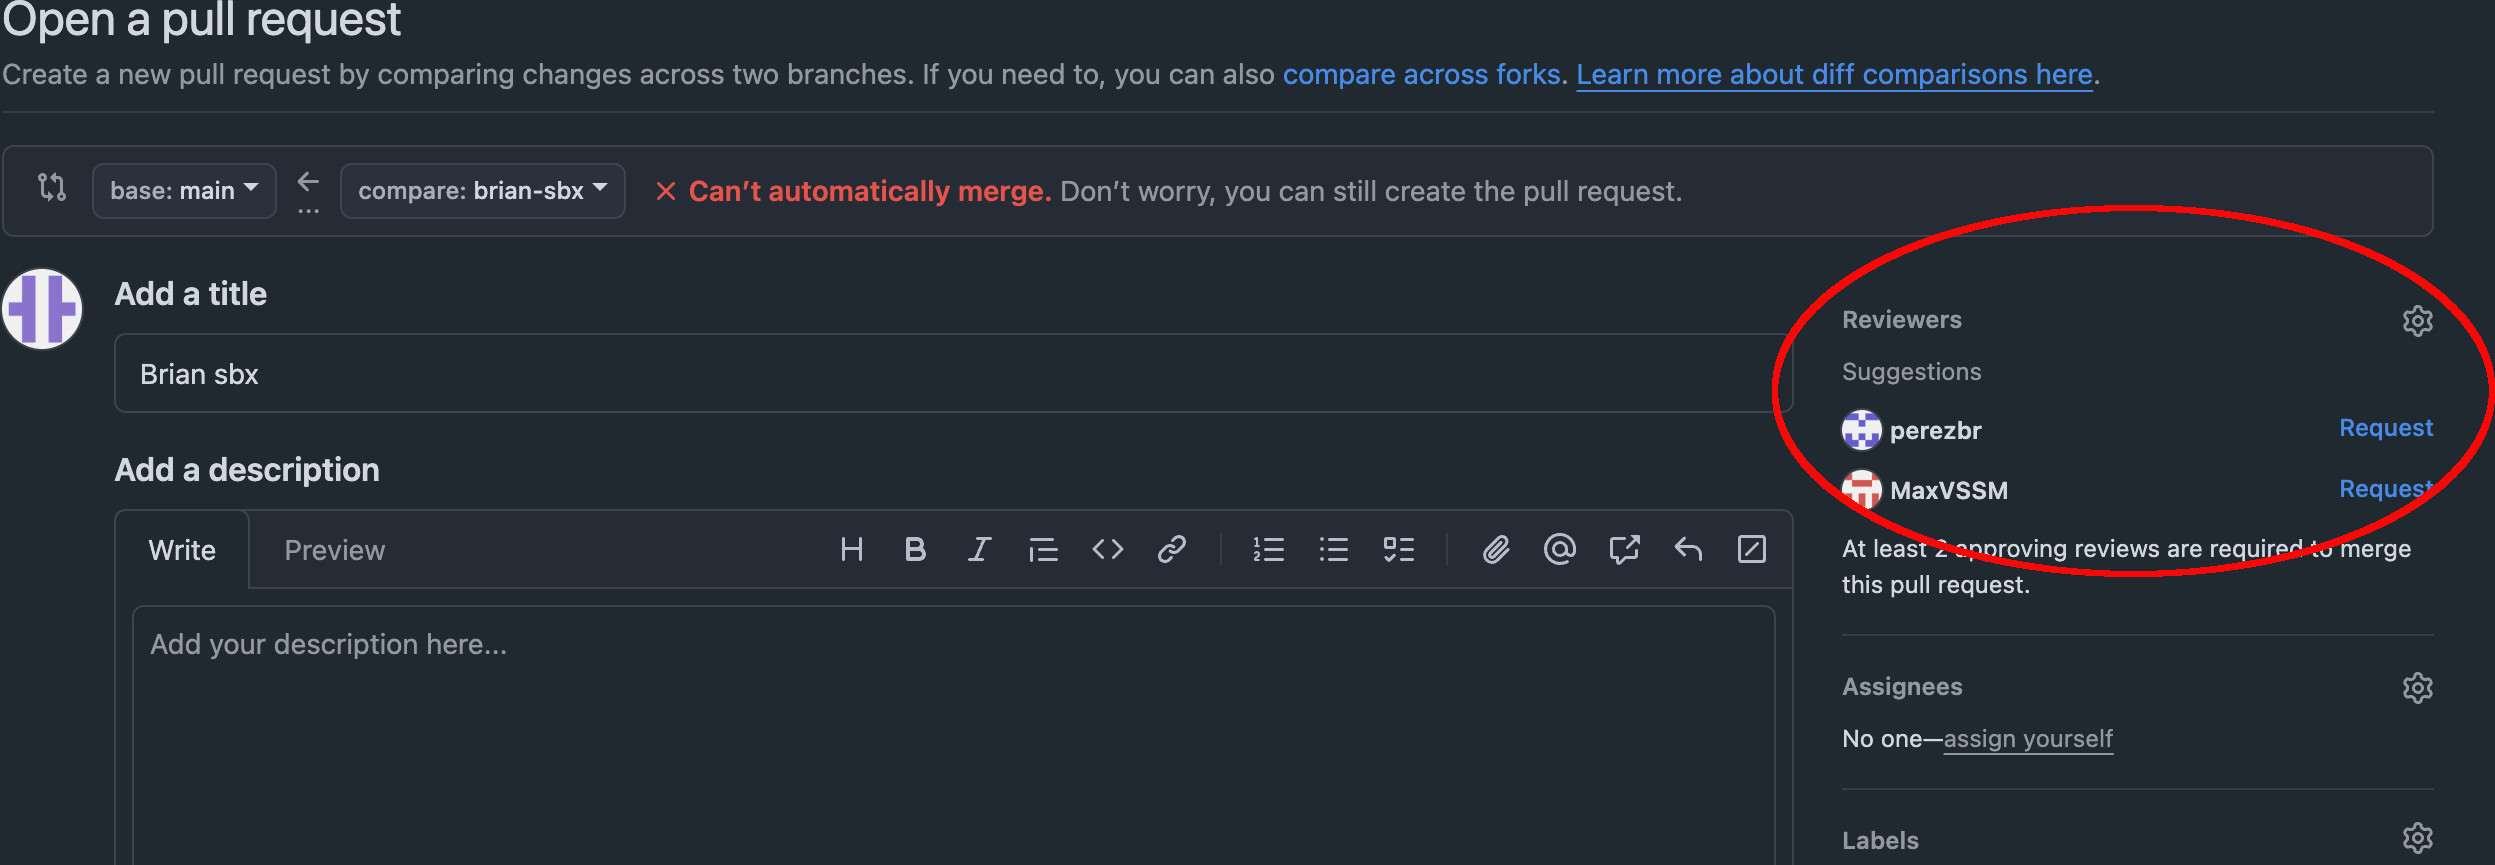
This will send a notification and/or email to the developer you selected. They will then be able to review your changes and provide feedback.
It's also not a bad idea to message the reviewer(s) on Microsoft Teams, or even better, you can create a Teams channel for your team, create a tag for code reviewers, and then mention the tag in the Teams channel with a link to the pull request. This will alert all of the reviewers in a centralized place so that you don't have to message each one individually. That way, everyone is on the same page.
Merging a pull request
Once you have received feedback and approved the pull request, you can merge it into the main branch. If you haven't already, read the guidelines for merging pull requests.